🚀 Get to pre-production in weeks, not months, with private training direct from Jube’s developer — real sovereignty, zero vendor lock-in.
Authentication Concepts
The Jube user interface sits atop of an API stage that can viewed by a Swagger interface as follows:
http://localhost:5001/swagger/index.html
The Swagger interface and the OpenAPI document describe every route, DTO and permission of the application, so they are only served to an authenticated caller: a browser with a signed-in session sees them, anyone else is challenged like any other protected page.
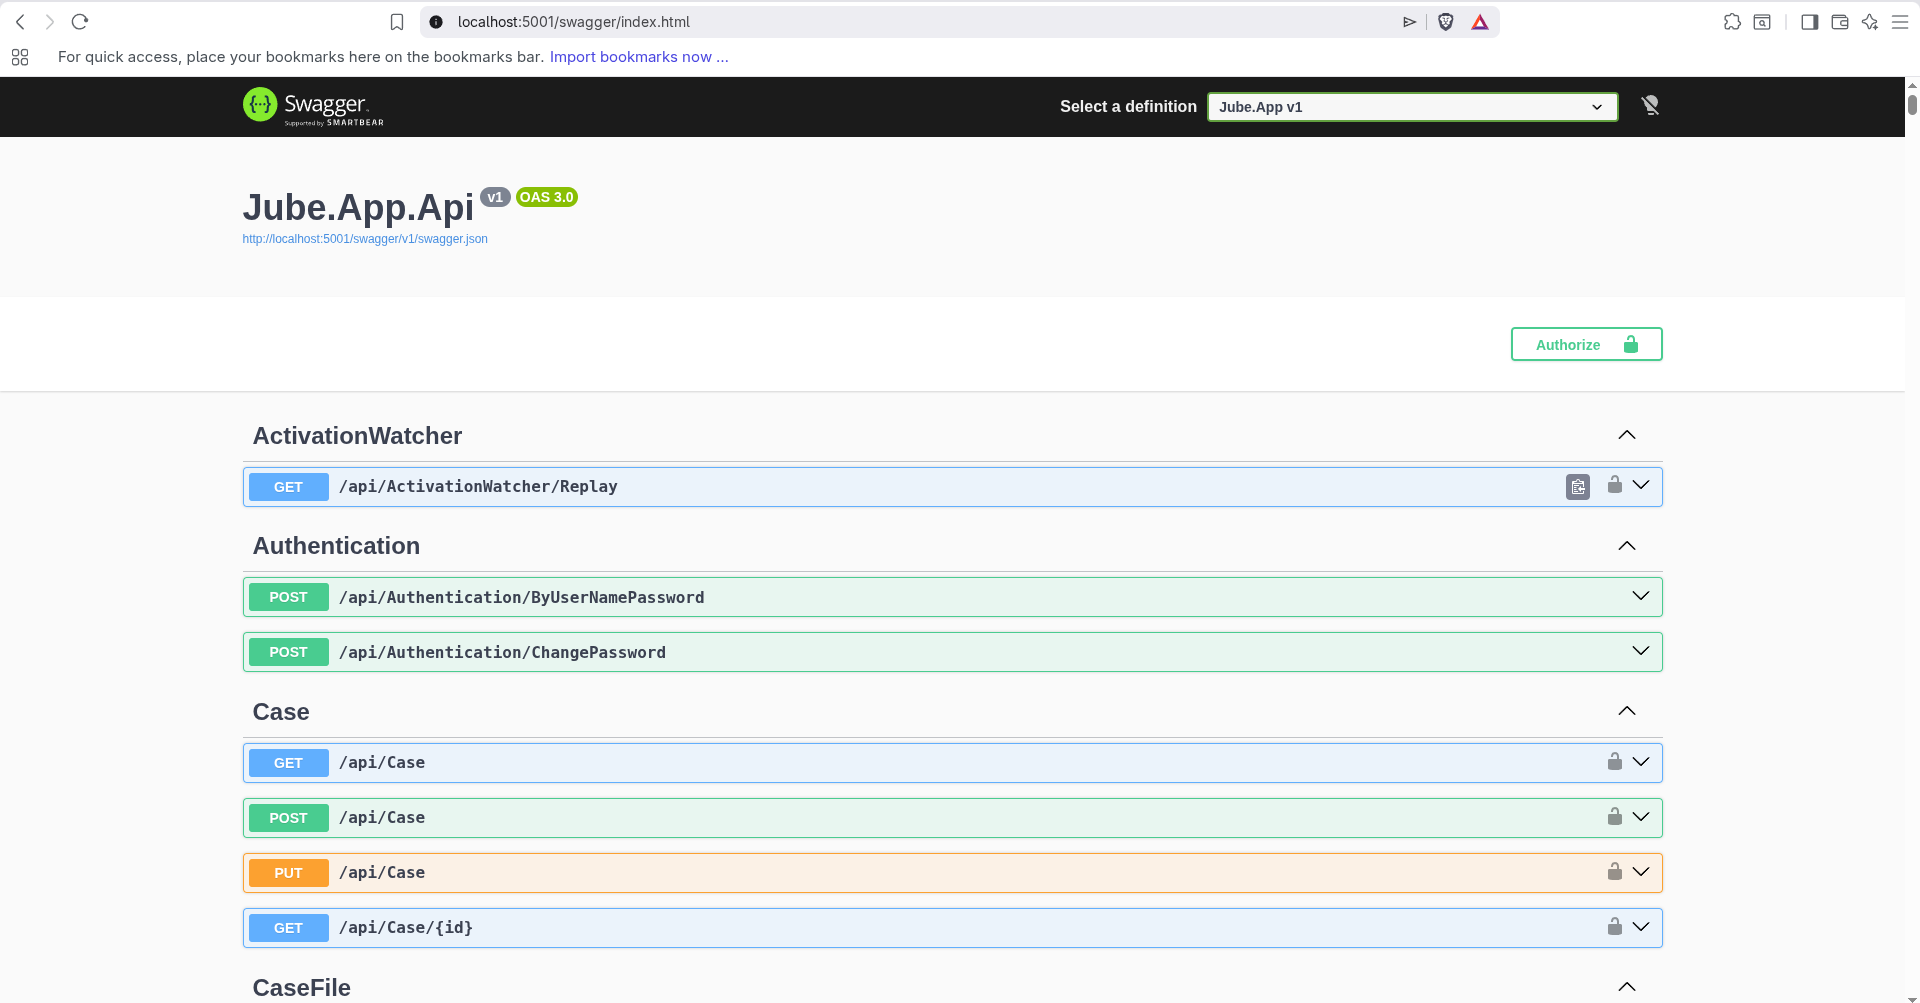
All but the Authentication endpoints, which exist for the purpose of creating an endpoint, require an authentication token:
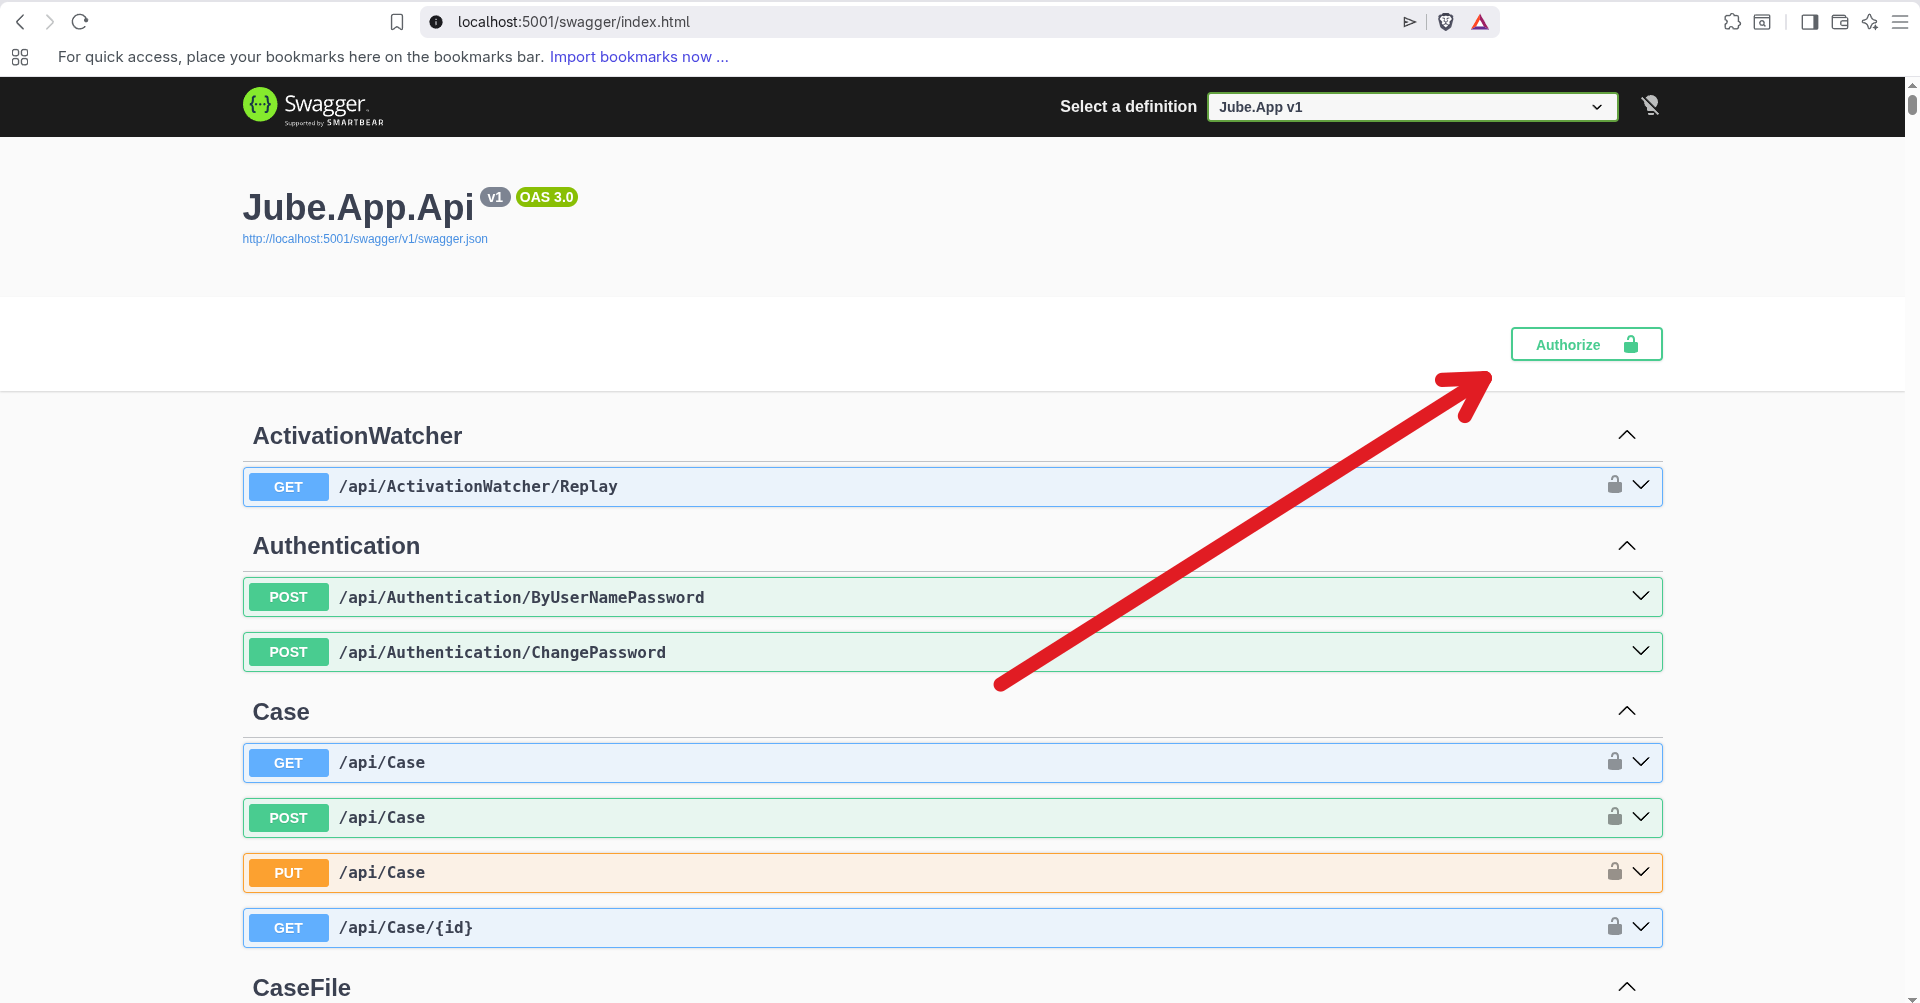
Clicking Authorise in the above case allows for the keys to be used throughout the Swagger session:
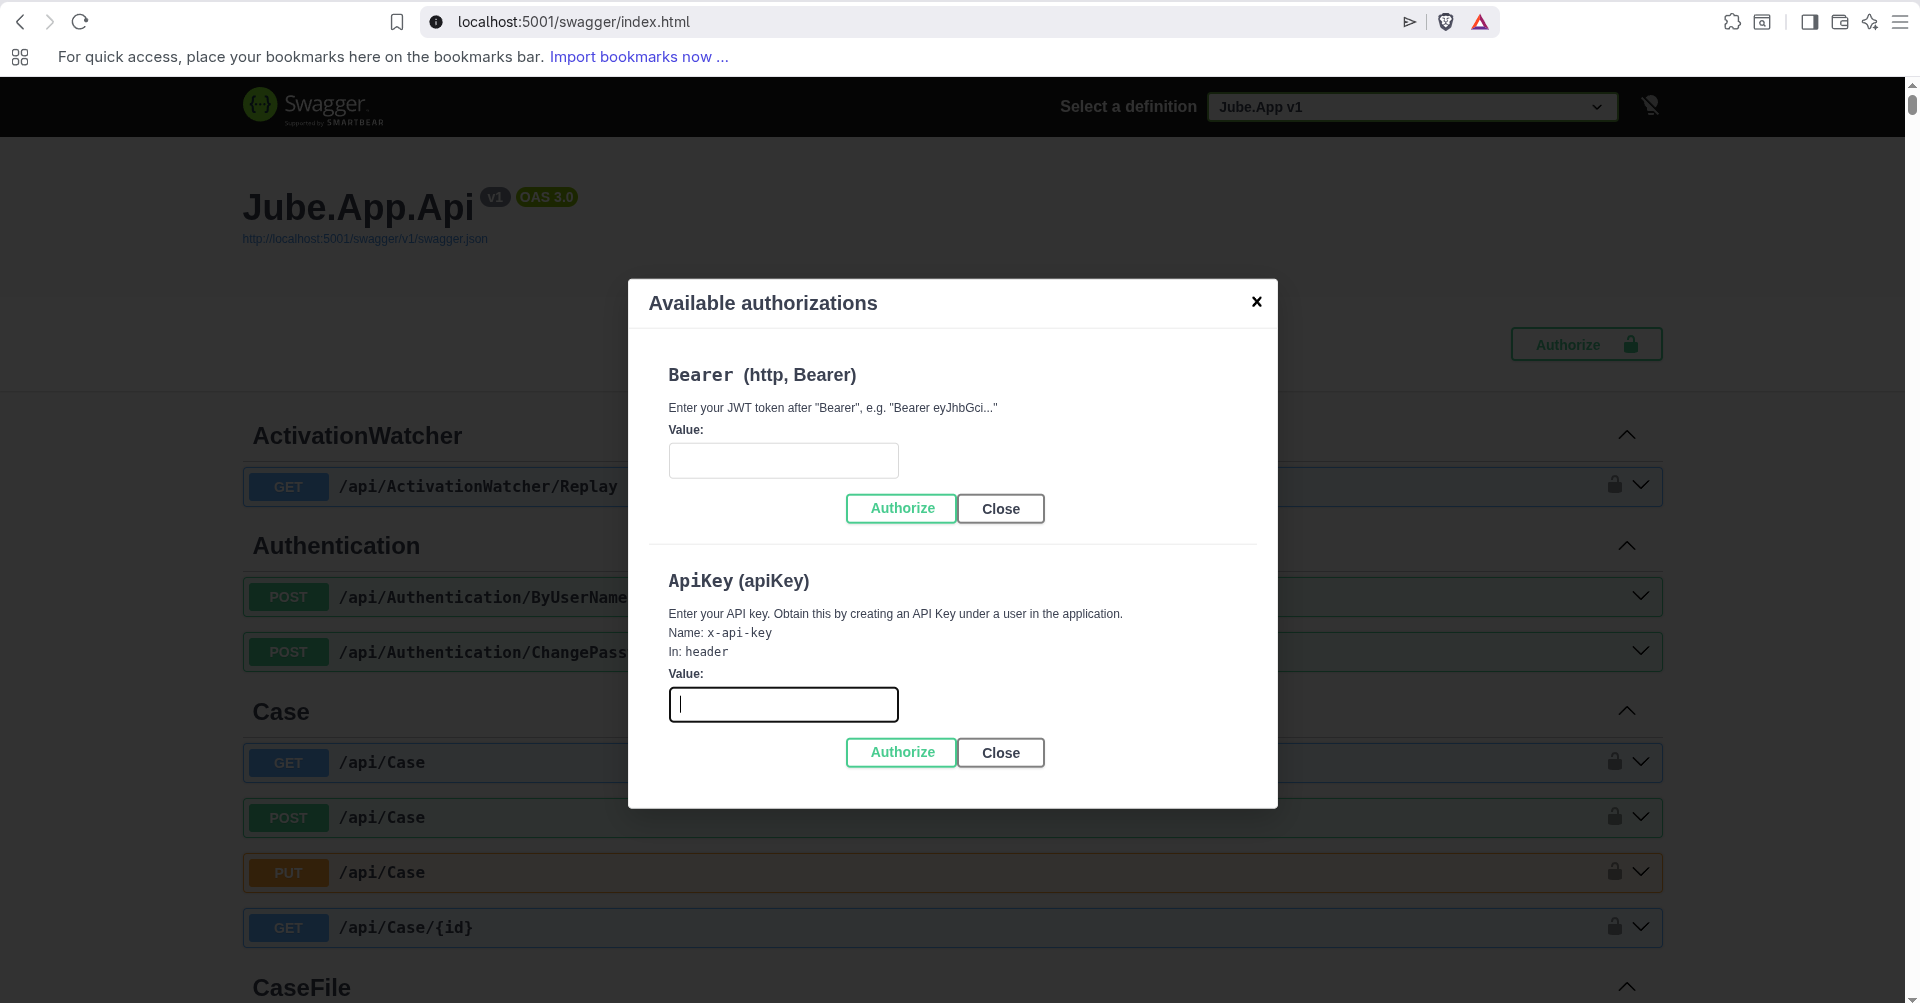
The keys in the above example are for illustrative purposes only however, and are analgous to HTTP headers:


Both methods of authentication are perfectly valid, and they share the same permissions approach, which means to say that both tokens only claim a user identity, with permissions being evaluated server side, and without the use of claims in the token.
JWT is not intended for API integration, notwithstanding that the user interface is a fascia of the API’s, and the use of API Key is encouraged for all formal integration beyond the user interface.
JWT Token Generation and Cookie Middleware
JWT Token Generation is not nessicarity a visible concept, in respect to remarks as being authentication made available for the user interface primarily. For completeness however, the user interface makes use of the following endpoint to trade a username and password for a JWT token:
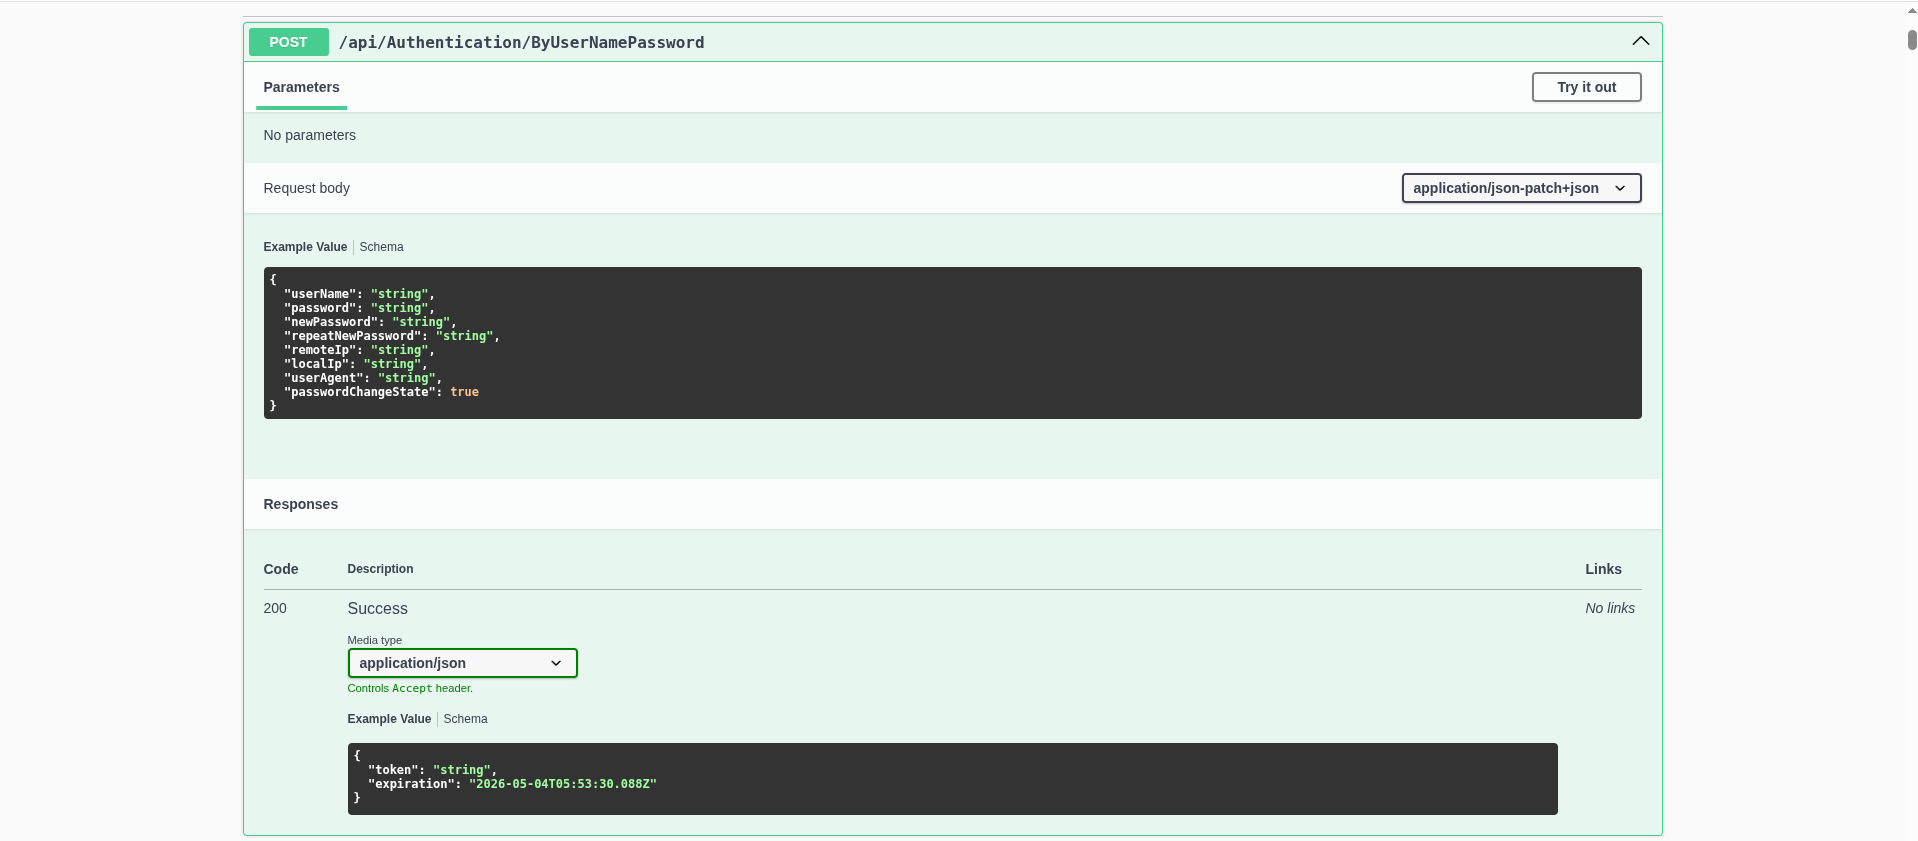
The above endpoint is highly inappropriate for use in external integration however, as it has a defined protocol that may signal password resent demands (which is not to say that an API Key does not tie to an account, but it is evaluated on a straight through real-time basis, and is not subject to expiry).
As the JWT Token Generation is intended for User Interface authentication, it also includes a step to pack the JWT Token into a cookie, and evaluates this cookie on each request, replacing the JWT token if close to expiry. For real-time integration especially, the Invoke controller, cookie maintainance is not appropriate.
API Key Generation
API Keys are created for Users via the User Interface. Navigate Admiistration »> Security »> Users:

Navigating to a User as otherwise documented, and taking note of the Generate API Key button:
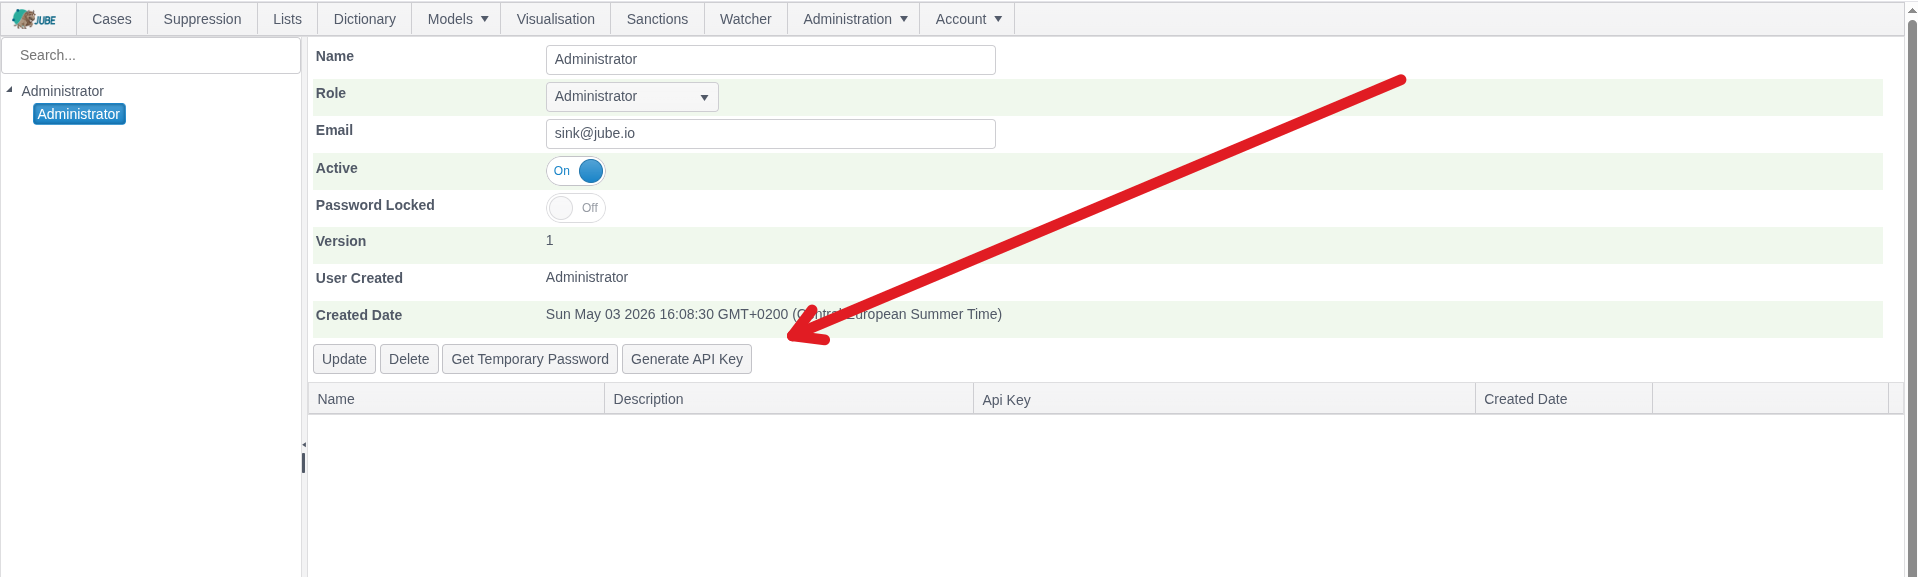
A user can have many API Keys to faciliate rotation. Click on Generate API Key:
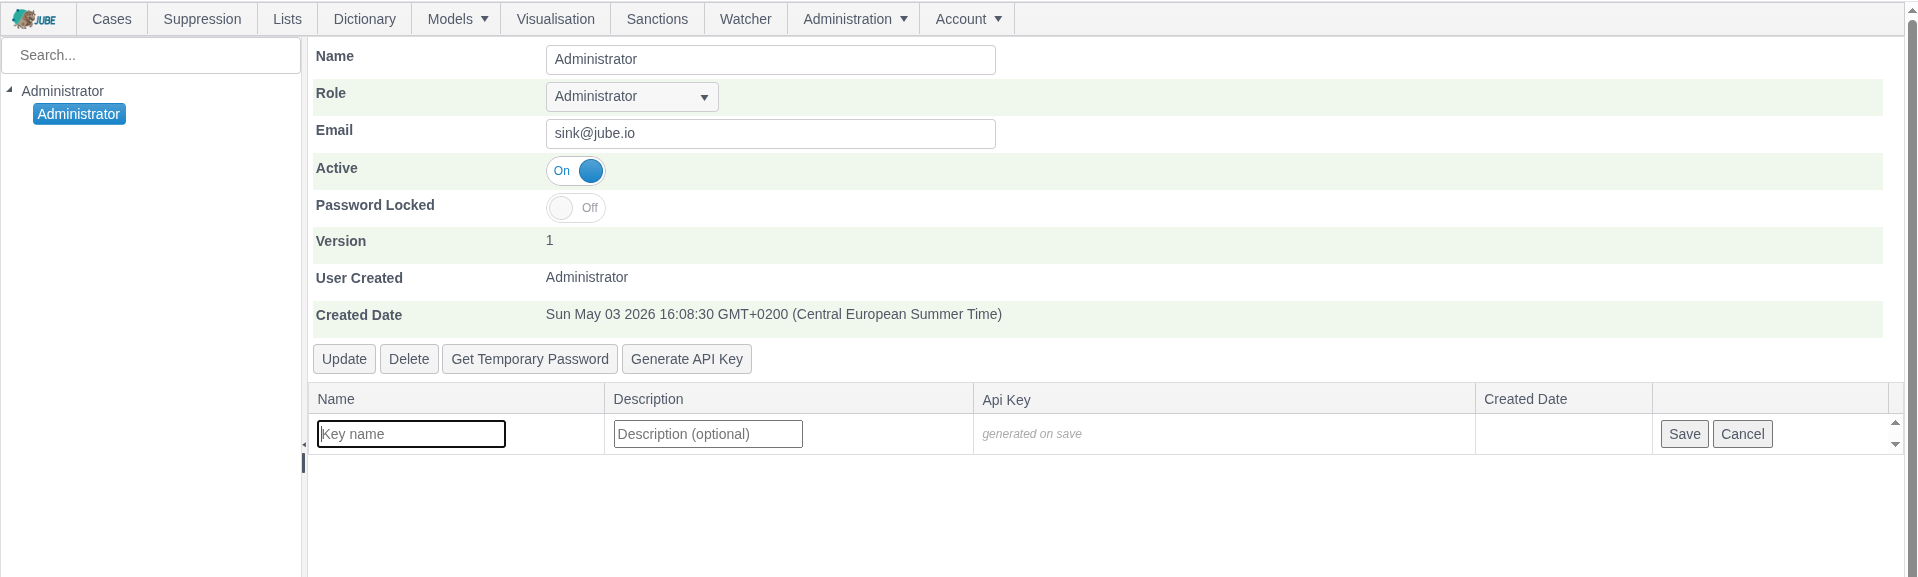
Complete the API Key’s Name, and optionaly a Description:
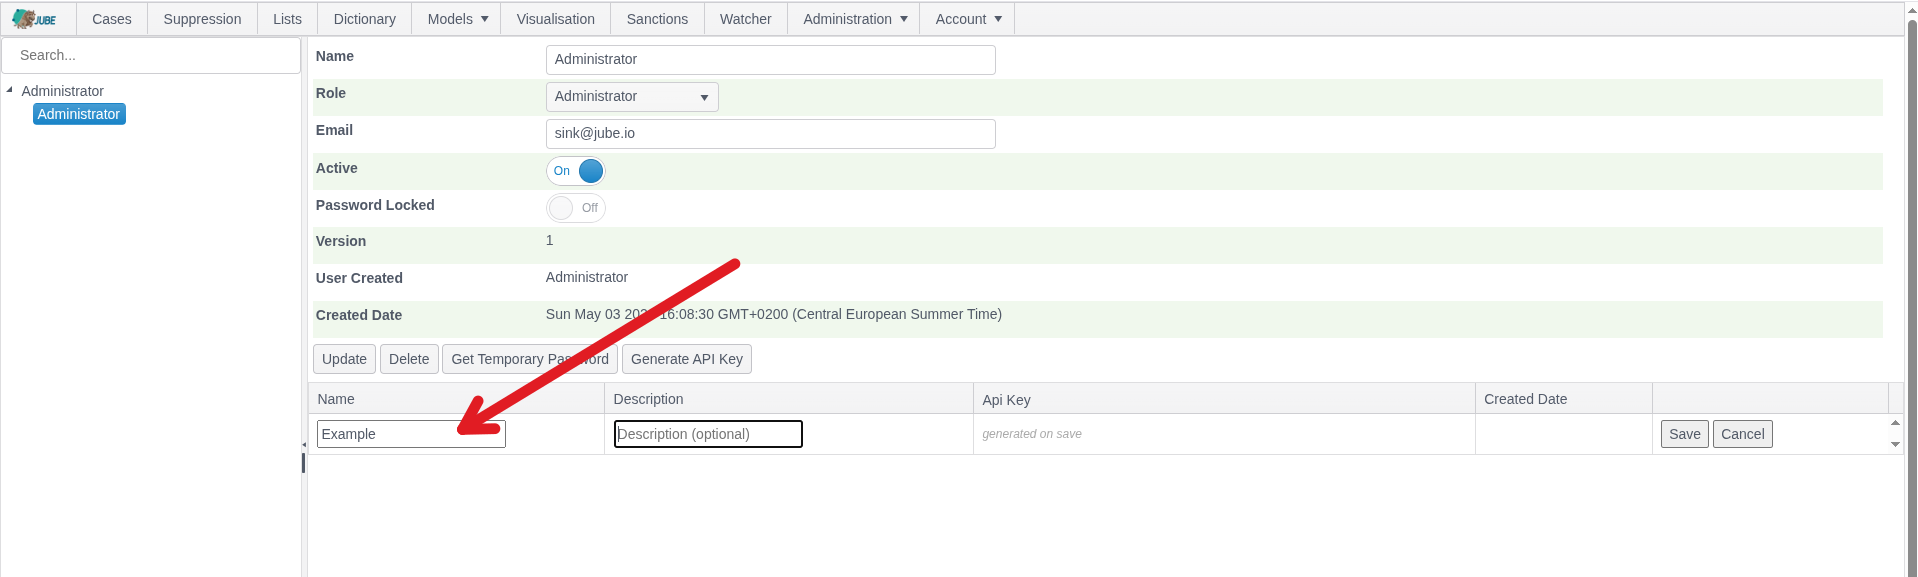
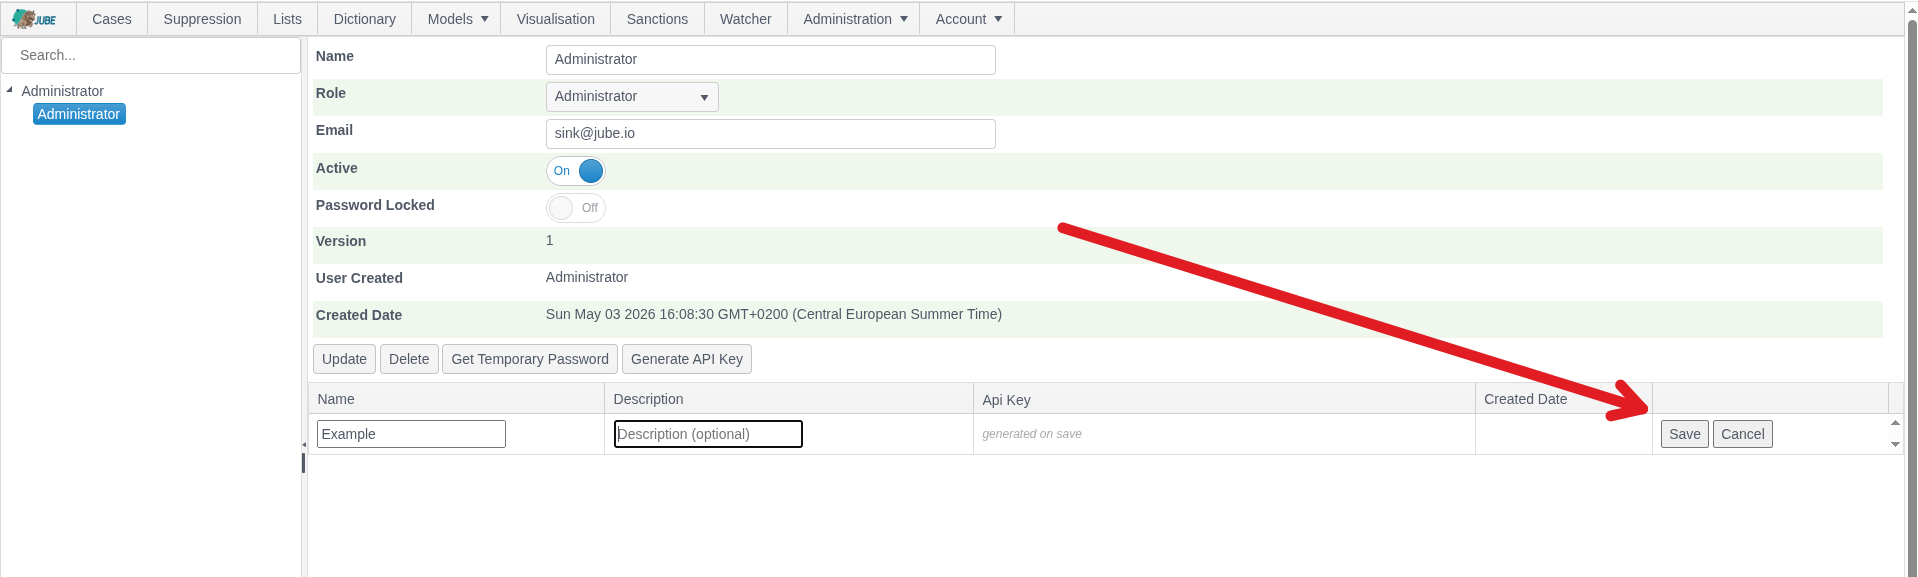
Click Save to generate the API Key:
On clicking Save, the API Ket will be exposed:
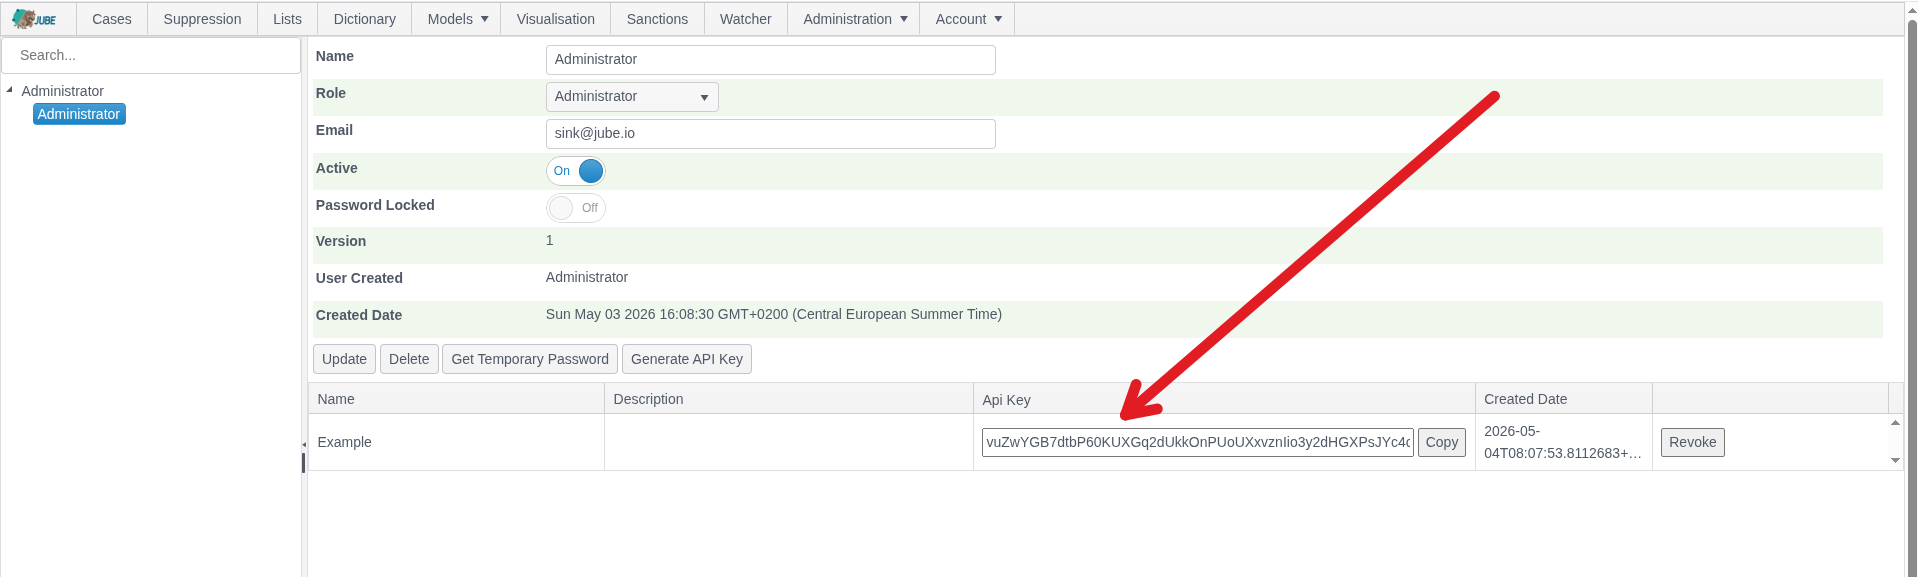
The API Key is not stored and this is the only time the API Key is available in the clear. The API Key is stored as a hash and is evaluated on a cryptographic basis. Keep the API Key safe, as it can’t be recovered, but of course new API Keys can be rotated in.
Each API key encodes the user identity and a tamper-evident checksum, secured with HMAC-SHA256. When a key is included in a request, it is validated against an in-memory cache of active tokens — verifying the embedded checksum and confirming the key has not been revoked — before the request is processed. Keys are stored and compared by their SHA-256 hash, so your raw key is never retained server-side. The first eight characters of your key serve as a display-safe identifier for auditing and support purposes.
The active API Key cache is maintained in the application and refresed minute, while also subscribing to publish events emmited via the Redis cache for more timely syncronisation of API Key creation and revoke. Redis cache publish subscribe if reliable, but not guranteed, hence the fall back in synconisation each minute. Redis publish and suscribe is most material in revoke events.
The API Key depends on a secret set in the Environment Variables ApiHmacKey and is intrinsic to the applications security and integrity of the API Key.
In the case of no active key found or cryptographic evaluation failure, the authentication is failed for the same outward reason of “Key Not Found”.
Order of Precidence
The authentication middleware handles tokens in the following order of precidence, and will evaluate exlusively:
- x-api-key.
- bearer (JWT).
- cookie (JWT).
Everything above this point concerns how a request is authenticated once a user’s identity has already been established. The sections below cover the three ways that identity can be established in the first place - Jube’s own Username and Password, Negotiate (Windows Integrated/Kerberos), and OAuth/OpenID Connect - along with Multi-Factor Authentication, which layers on top of the first two. In every case, once identity is established Jube issues its own JWT and cookie exactly as described above - none of the three schemes changes how the rest of the API is authenticated afterward.
Authentication Schemes
Jube supports three mutually exclusive schemes for establishing a user’s identity at login. Username and Password is Jube’s own built-in scheme; OAuth and Negotiate are alternatives that delegate identity verification elsewhere. OAuthAuthentication and NegotiateAuthentication cannot both be True at once, and Username/Password login (including password changes) is disabled whenever either of the other two is enabled - there is no scenario where more than one scheme is live at a time.
OAuth / OpenID Connect
Setting OAuthAuthentication to True enables OAuth 2.0 / OpenID Connect as the login scheme, using the authorization code flow with PKCE. Configure the identity provider via OAuthAuthority, OAuthClientId and OAuthClientSecret - see Environment Variables.
When OAuth is enabled, the Login page redirects straight to the identity provider rather than showing Jube’s own username/password form. On successful sign-in, Jube looks up the returned identity claim (trying, in order, the claims a provider is most likely to populate) against the UserRegistry - the user must already exist and be active in Jube; OAuth verifies who the person is, it does not create an account for them. If no matching active user is found, sign-in fails and the browser is returned to the Login page.
Jube continues to issue its own JWT and session cookie after a successful OAuth sign-in, exactly as it does for Username/Password or Negotiate - identity verification is delegated to the OAuth provider, but session/token issuance is not.
Multi-Factor Authentication is assumed to always be handled by the OAuth identity provider itself - Jube does not add a second MFA step of its own on top of an OAuth sign-in the way it can for Negotiate (see below).
By default the callback response uses OpenID Connect’s form_post mode; OAuthForceGet switches to a GET/query-string response for identity providers that require it. Redirect-after-login is restricted to local URLs only (so a user returns to the page they were on before being redirected to sign in), guarded against open-redirect attempts.
The OAuthForceRedirect environment provides the option to ignore the RedirectUrl propaganted through OAuth, and override it with an explicit redirect, so that a singular landing page can be enforced.
Negotiate (Windows Integrated / Kerberos)
Setting NegotiateAuthentication to True enables Negotiate authentication - commonly known as Windows Integrated Authentication against Active Directory - as an alternative to Username/Password. This is common in corporate environments where the browser can silently present the signed-in Windows user’s credentials.
The Login page loads with the username/password form hidden and immediately calls GET api/Authentication/ByNegotiate in the background. That endpoint requires Negotiate authentication, so a browser configured for integrated authentication (for example, a domain-joined machine with the site in its trusted intranet zone) completes the Kerberos/NTLM handshake transparently and the call succeeds without the user seeing a login form at all; a browser that cannot complete the handshake gets a 401, and the page falls back to showing the manual login form. If Multi-Factor Authentication is also enabled, a successful Negotiate handshake returns 202 instead of signing in directly, and the page reveals only the MFA field for the user to complete.
Multi-Factor Authentication (RSA SecurID)
MFA is implemented behind an IMfaProvider abstraction (Jube.Mfa), with RSA SecurID as the only provider currently shipped (RsaSecurIdMfaProvider). Nothing in configuration selects between providers today since there is only the one, but the separation exists so an alternative second factor could be added without reworking the authentication pipeline that calls it.
Setting EnableMultifactorAuthentication to True adds a second authentication step - an RSA SecurID one-time passcode - enforced after either Username/Password or Negotiate sign-in (not after OAuth, which is assumed to already cover MFA at the identity provider). Configure the real RSA Authentication Manager endpoint via MultifactorAuthenticationEndpoint, MultifactorAuthenticationApplicationId and MultifactorAuthenticationClientKey - see Environment Variables.
MultifactorAuthenticationEndpoint defaults to http://localhost:5001/api/mfa, which resolves to Jube’s own bundled mock RSA endpoint (it accepts only the fixed OTP value 12345678, and only while MultifactorAuthenticationClientKey is left at its own shipped default). Enabling EnableMultifactorAuthentication without also pointing MultifactorAuthenticationEndpoint at a real RSA Authentication Manager will silently succeed against the mock rather than performing genuine second-factor verification - both settings must be changed together before MFA can be considered actually enforced.
For outbound calls to the RSA endpoint, OutboundHttpRsaAmCertificateBypass disables TLS certificate validation entirely (avoid in production), and OutboundHttpRsaAmCertificateThumbprint instead pins trust to one specific certificate by its SHA-1 thumbprint, tolerating chain-trust errors only - the safer option of the two where the RSA endpoint sits behind a certificate that doesn’t chain to a publicly trusted root. Both are currently implemented for the RSA MFA endpoint only, not for HTTP Adaptation or other outbound webhooks. Generally speaking, the cause of a certificate error should be fully understood, and while in middleware it is commonplace will nontheless require some explanation.
Login Lockout and Session Behaviour
PasswordAttempts (default 3), otherwise controlled in the Evnrionment Variable PasswordAttempts, controls how many consecutive incorrect password attempts are tolerated before an account is locked - note that with the default value the account locks on the fourth consecutive failure, since the check is “more than” the configured value rather than “at least.”
SessionCookie Environment Variable (default True) controls whether the authentication cookie is a browser-session cookie, cleared when the browser fully closes, rather than persisting per its own expiry regardless of the browser closing.
Session Lifetime, Refresh and Revocation
The JWT issued at login (and carried in the authentication-jwt cookie) is valid for 15 minutes. Each authenticated request made through the user interface replaces it with a fresh 15 minute token, so an active session slides forward. A session is never extended beyond SessionAbsoluteLifetimeInterval/SessionAbsoluteLifetimeIntervalValue (default n/720, twelve hours) counted from the original login, because every refreshed token carries the instant the session began: after that age the user must log in again, however active they were.
Tokens are also revocable. UserRegistry.TokensValidFrom holds, per user, an instant before which every JWT is refused with a 401 on its next request. It is read from the database on every authenticated request, so a revocation takes effect on every node at once without any shared cache. The instant is set when the user logs out, when the user’s password is changed, and when an administrator presses Revoke Sessions on the user’s page (Administration »> Security »> Users, permission Read Write Security User, POST /api/UserRegistry/RevokeTokens/{id}, which answers 204 and only reaches users of the caller’s own tenant). API Keys are not affected by any of this: they are validated separately, on every request, against the key list, and are revoked from the API key list of the user. Open streaming connections (Watcher, Service Change) are re-checked against the same rules every RevokedSessionCheckInterval/RevokedSessionCheckIntervalValue (default s/30) and closed when their session has ended.
Logging out is POST /api/Authentication/Logout, which is anonymous by design and fails closed: whatever the state of the presented credential (missing, malformed, expired or already revoked) it deletes the authentication-jwt and authentication-expiry cookies and answers 200, and where the credential is a valid session it also revokes every token of that user as above. It is a POST, never a GET, so that a web page cannot log a user out by embedding a link; a request authenticated only by the cookie must be provably same-origin (see CsrfOriginCheck). The /Account/Logout page asks for confirmation and its button calls that endpoint.
Login Audit Trail
Every sign-in attempt, successful or not, and regardless of which of the three schemes was used, is recorded to the UserLogin table. It is browsable via the Administration > Security > User Login page, or directly via GET /api/UserLogin – same conventions as every other observability grid in this codebase (take/from/to/ search/samplePercentage, CSV export, permission-gated). A tenant administrator sees the sign-ins of their own tenant only; a landlord sees all of them, and failed attempts against a user name that does not exist are shown to a landlord only. It is not purged: unlike the ephemeral operational telemetry elsewhere in this codebase (Redis/Postgres metrics, etc.), the Login Audit Trail is a permanent record. It can equally be queried directly, for example:
select "CreatedUser", "RemoteIp", "AuthenticationTypeId", "Failed", "FailureTypeId", "FailureMessage", "CreatedDate"
from "UserLogin"
order by "CreatedDate" desc
AuthenticationTypeId records which scheme was used:
| Value | Scheme |
|---|---|
| 1 | Username and Password |
| 2 | Negotiate (Windows/Kerberos) |
| 3 | OAuth / OpenID Connect |
FailureTypeId is only populated when Failed is set, and records why:
| Value | Meaning |
|---|---|
| 1 | No User Registry found matching the supplied username. |
| 2 | The User Registry matched is not Active. |
| 3 | The User Registry matched is Password Locked. |
| 4 | Username/Password only: the password has expired and must be changed, but no NewPassword was supplied. |
| 5 | Username/Password only: the supplied password did not match (bad credentials). |
| 6 | Username/Password only: no password was supplied at all. |
| 7 | OAuth only: the identity provider’s ticket contained no usable identity claim. |
| 8 | OAuth only: a remote/identity-provider failure (the IdP itself returned an error, e.g. access denied, misconfiguration). |
| 9 | OAuth only: local authentication/token-validation failed (e.g. an expired or malformed token). |
| 10 | OAuth only: an internal error occurred while processing the ticket (e.g. a database error validating the user). |
FailureMessage is populated for OAuth failures only (FailureTypeId 7-10) – the identity provider’s own error message or a token-validation exception message. Username/Password and Negotiate failures already have a small fixed FailureTypeId vocabulary that needs no free text, so FailureMessage is left null for those.
Previously, only successful OAuth sign-ins were ever recorded here – every OAuth failure path returned without writing a UserLogin row at all, despite this page’s claim otherwise. That gap is now closed: every OAuth failure branch (no usable claim, no matching/active User Registry, a database error, a remote/IdP failure, a local token-validation failure, or any other unexpected exception) now records a UserLogin row with Failed = 1 and an appropriate FailureTypeId, exactly as Username/Password and Negotiate already did.
Logout and the Logout Audit Trail
Logging out is POST /api/Authentication/Logout. It is anonymous by design and fails closed: whatever the state of the credential presented (none, expired, garbage, already revoked), the response expires both authentication cookies and answers 200. When a valid session is presented, every token the user has been issued so far is revoked in the database (so it is honoured on every node) and the user’s open streaming connections are closed. API keys are not touched, and a request that carries an X-API-KEY header is not treated as a browser session. If the revocation cannot be written the browser is still logged out; the response carries an X-Jube-Logout-Warning: revocation-failed header and the reason is in the application log at ERROR, because a copied token then stays valid until it expires.
There is no antiforgery token on logout. A logout is protected against cross-site requests by the same rule that protects every other cookie-authenticated POST: a request that carries the session cookie and is not provably same-origin (Sec-Fetch-Site, Origin or Referer) is refused with 403. A GET never logs anyone out: the /Account/Logout page shows a confirmation button, which calls the endpoint, and then the “logged out” message.
Every session that is cut is recorded in the UserLogout table, browsable via Administration > Security > User Logout, or GET /api/UserLogout (same conventions and permission as the Login Audit Trail; a tenant administrator sees the sessions cut for the users of their own tenant, a landlord sees all of them). Each row records who, when, why (ReasonId: 1 the user logged out, 2 an administrator revoked the user’s tokens through Revoke Sessions, 3 a password change revoked the earlier sessions), the outcome (OutcomeId: 1 revoked, 2 no session was presented and only the cookies were cleared, 3 the revocation failed), the remote and local address, the user agent, when the session that was cut had started, and for an administrator revocation who cut it. Callers with no session are recorded at most once a minute per address, and every text column is length bounded and stripped of control characters, so a hostile User-Agent is stored as inert data. The Logout Audit Trail is a permanent record, like the Login Audit Trail.
Password Transport Hardening
Two independent, combinable options control how a password is protected in transit from browser to server, on top of the connection already being HTTPS:
Wire password hashing (WirePasswordHash, a per-user flag set when a password is administered/reset) has the browser compute SHA-256 (password + username) in JavaScript and send only that hash, rather than the plaintext password, as the credential. Argon2 hashing of the credential still happens server-side as normal - this is an additional privacy layer in front of it, not a replacement. Because the flag is per-user and defaults to unset, existing users continue sending their plaintext password (over HTTPS, still Argon2-hashed server-side) until an administrator resets their password with the flag enabled. Because the server only ever receives a hash once this is on, password strength rules (length, character classes, and so on) can only be enforced in the browser at that point, not re-checked server-side.
RSA asymmetric password transport (PasswordAsymmetricEncryption, default False) additionally has the browser encrypt the password with an RSA public key before sending it, decrypted server-side with the matching private key (PasswordAsymmetricEncryptionPublicKey / PasswordAsymmetricEncryptionPrivateKey). Both key Environment Variables default to unset, and Jube refuses to start if PasswordAsymmetricEncryption is True while either is missing - so generating and setting a fresh, per-environment keypair before turning this on is enforced, not just recommended. See Environment Variables for the specific variable names.
Where wire hashing and asymmetric encryption are both of interest, RSA transport plus WirePasswordHash left disabled is the recommended combination - it keeps server-side strength validation working (since the server still receives the real password, just encrypted in transit) while still avoiding plaintext on the wire.